
Guide · · AF-Automotive
Replacing a Mercedes air strut: the complete checklist
An air strut job is straightforward on paper, but the details decide whether the car leaves sitting straight or comes back next week. This checklist covers the whole job, from the first diagnosis to the final ride height check. Print it, pin it on the wall, and tick it off as you go.
Safety first. An air suspension holds the car up with compressed air. Always follow the manufacturer's repair information, support the car on stands or a lift before working under it, and release pressure only as described in the procedure.
Before you start
- Confirm the fault. Park overnight and see which corner drops. Check for leaks with soapy water on the strut, air line fittings and valve block.
- Read the fault memory of the AIRMATIC system and note the faults.
- Check the compressor. A strut that has leaked for a long time often leaves a tired or overheated compressor and relay behind.
- Order the correct strut for the chassis and engine variant, plus any one-time parts the repair information calls for (nuts, bolts, O-rings).
- Have a diagnostic tool ready for jack mode and ride height calibration, and an angle tool if the model needs angle values.
Prepare the car
- Switch on jack mode or lift mode (through the scanner or the vehicle menu, depending on model) so the system does not try to level while the car is in the air.
- Lift the car and support it safely. Remove the wheel.
- Clean around the air line connection before disconnecting it, so no dirt enters the line.
- Release the pressure in that strut as the repair information describes.
Remove and fit
- Disconnect the air line and, if fitted, the damper control connector.
- Support the lower arm before undoing the strut mounts.
- Remove the old strut. Compare it with the new one: length, mounts, connector and air line fitting.
- Fit the new strut. Do not let it hang on the air line or the wiring.
- Tighten the mounts to the torque values in the repair information.
- Where the procedure says so, leave bolts that clamp rubber bushes finger tight until the car is at ride height.
- Connect the air line with a new O-ring or fitting if specified. Remove the transport cap or residual pressure fitting only at this step.
- Reconnect the damper connector.
Bring it back up
- Refit the wheel and torque the wheel bolts.
- Lower the car until it stands on its wheels, then switch jack mode off.
- Start the engine and let the compressor fill the strut. Watch the corner rise evenly.
- Tighten any bushes at ride height as specified.
- Check the new connection for leaks with soapy water.
- Clear the fault memory and read it again.
Calibrate the ride height
- Park on a level lift or floor, tyres at the label pressure, car empty.
- Let the car settle for a few minutes.
- Run the level calibration routine in your diagnostic tool.
- Measure each corner at the point the routine shows, the same way at every corner, and type in the values with the correct sign.
- Finish the routine and restart the car.
Final checks
- Short test drive: listen for knocks and check that the level warning stays off.
- Park on the level surface and measure all four corners again.
- Check the car again the next morning. No corner should have dropped.
- Note the measured values on the job card, so the next calibration has a reference.
Common mistakes
- Working without jack mode, so the system pumps or drops while you work.
- Letting dirt into the air line.
- Tightening bushes with the suspension hanging, which preloads them and can shorten their life.
- Skipping the calibration because the car "looks fine".
- Mixing up left and right or the sign when typing in the values. See the seven common causes of an uneven car after calibration.
About ASAT pro
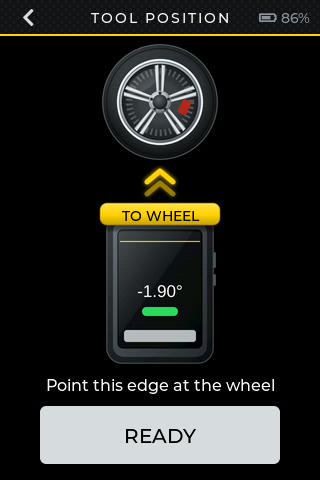
ASAT pro for Mercedes is a standalone measuring instrument made for ride height calibration. Hold it under the arm or shaft with its 4-point base pressed up against it and the screen facing down toward you, read the angle (±0.1° or better) and type it into whatever diagnostic tool you use. Guided mode walks you through all four corners in a fixed order, locks each value when the reading is steady, and shows all four on one summary screen. A built-in flashlight lights the measuring point, and the touch screen works with gloves.
ASAT pro for Mercedes is $1,099. ASAT pro Alu for Mercedes, with a CNC aluminum base, is $1,299. Designed and built by AF-Automotive. Professional measurement made simple.
More articles
- How to measure the angle for Mercedes AIRMATIC calibration
- ABC suspension calibration: the angle step explained
- How to choose an angle tool for Mercedes ride height calibration
- Car sits uneven after level calibration: 7 common causes
Mercedes-Benz, AIRMATIC, ABC, Active Body Control and E-ACTIVE BODY CONTROL are trademarks of Mercedes-Benz Group AG. Romess, Haweka and Autel are trademarks of their owners. AF-Automotive is an independent company and is not affiliated with any of them. Prices are approximate as of October 2026 and may change. Always follow the manufacturer's repair information for your vehicle.